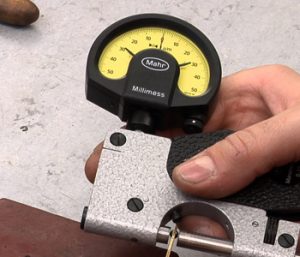
Precision Gauging – In some manufacturing plants, metal parts made accurate to 0.01 inch. In other plants, there are products that cannot tolerate size differences of even a few millionths of an inch. Making parts to either tolerance range is impossible without accurate gauging.
However, accurate gauging is impossible if liberties takes it with the design, handling and maintenance of precision
measuring instruments. Understanding the following nine major enemies of precision gauging will help defend your measurements against inaccuracy.
Wear. The enemy that often ignored. For example, linear measurements usually made by contact between gauging and work-piece surfaces. The gauge wears a little each time it is used and inaccuracy grows by attrition. Wear also deforms gauge contacts and flattens spherical contacts producing discrepancies. The best therapy for gauge wear is systematic checking and calibration against accurate masters.
Dirt. Many measurement errors traces to someone’s grubby hands. Those who measure in millionths of an inch should exceed even surgical standards of cleanliness. This applies especially to people who cannot seem to wring gauge blocks together without using what known as wrist oil. A mixture of pore effluent, skin particles, grit, oil and coolant, which coats gauging surfaces with a cement-like sludge ranging from 0.00005 to 0.0005 inch, is height.
Looseness. The average user of gauges tends to make sure the relevant screws, nuts and clamps are secure. However, internal looseness caused by wear may fool the user. For example, sometimes gauge platens and bracket arms creep or a work-piece does not settle firmly into place. The key to diagnosing looseness is measurement repetition. If the same reading does not come up twice then looseness is the likely culprit.
Deflection. Present and active, deflection never seen or felt except by special means. Isaac Newton described deflection in his third law of motion, which states that for every action there is an equal and opposite reaction. Visualize pushing a cylinder into a gauge. Although the contacts separate to accept it, the internal clamping force of the spindle acts equally against the frame, thus causing it to deflect slightly. What is being measured—the work-piece, the frame deflection or both?
Gauging Pressure. This force must be heavy enough to have unwavering authority but not so heavy as to deform the work-piece. Pressure errors usually stem from too much rather than too little force.
Temperature. Everyone agrees that a work-piece is bigger when it is hot. Any action taken to alleviate this usually involves cooling the part too much. There should be a big flashing sign in every precision gauging area that reads, “Keep the temperatures of the workpiece, gauge and master the same.”
Vibration. There are people who put a “millionth” comparator near an aisle used by fork trucks. Others sit them
next to air compressors or thumping punch presses. The moral is, does precision works where your comparator will not get the jitters.
Geometry. Measurement must be square to the axis. This is elementary, almost to absurdity. Nevertheless, it points out a major source of error. Whether the instrument is a hand “mike” or an interferometer, many operators persist in cocking the work-piece or cramping the gauge just enough to get a wrong answer.
Approximation. A look at any mechanical micrometer reading shows where this enemy lurks. Perhaps it reads
0.494 inch—and a little more. What is your guess on the “little more”-0.4942, 0.4943 or 0.4944 inch? Do you use this as the true reading? The usual cure is to get an instrument with higher magnification or one with an accurate scale subdivided more closely. Another solution is to switch to a digital readout.
There are other known causes of gauging error, and there are still more to discover. However, the firm that tackles this list will have taken a big step toward greater precision and accuracy.